
Before every trade, there’s one question most traders skip:
“Are conditions good enough to risk capital right now?”
Pre-Trade Check exists to answer that — quickly and objectively.
Before you apply any strategy, make sure you actually understand how 1-minute scalping works.
Read the full guide first →
👉 The Ultimate 1-Minute Scalping Strategy Explained
It doesn’t predict price.
It doesn’t generate signals.
It doesn’t replace your strategy.
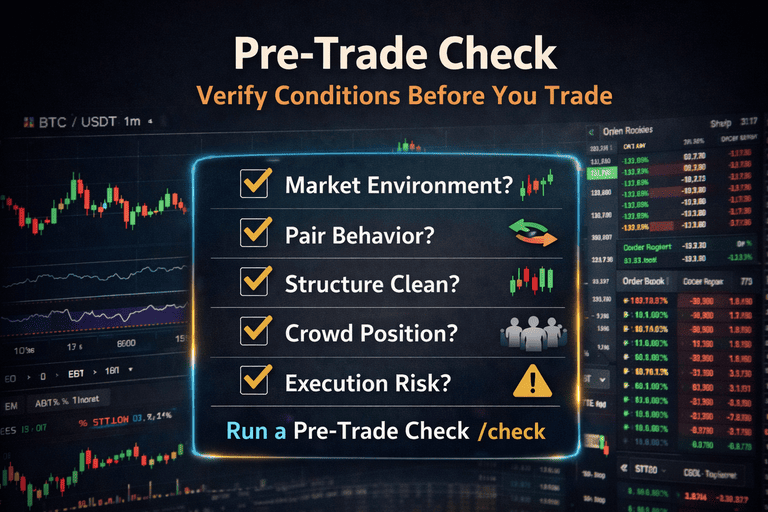
Pre-Trade Check helps you verify whether:
-
The market environment is suitable
-
The pair is behaving cleanly
-
Structure is readable
-
Execution conditions won’t sabotage the trade
Most losses in 1-minute scalping don’t come from bad entries.
They come from trading when conditions are wrong.
This page explains how Pre-Trade Check works — and why running it before every trade is one of the simplest edges a scalper can have.
If this is your last stop before clicking Buy or Sell, you’re exactly where you should be.
What Pre-Trade Check Is (And What It Is Not)
Pre-Trade Check is a pre-trade filter.
You use it after you have a trade idea —
but before you commit money.
Its purpose is simple:
to help you avoid bad trades, not to push you into more of them.
Pre-Trade Check helps you quickly answer:
-
Is the overall market environment suitable right now?
-
Is this specific pair behaving cleanly?
-
Is structure readable on low timeframes?
-
Are traders crowded heavily on one side?
-
Is execution likely to hurt this trade?
If the answers aren’t aligned, the correct action is simple:
Don’t trade.
That single decision saves more capital than most strategies ever make.
Why Pre-Trade Checking Matters on the 1-Minute Timeframe
On higher timeframes, mistakes have room to breathe.
On the 1-minute chart, they don’t.
On low timeframes:
-
Spread matters
-
Slippage matters
-
Noise matters
-
Execution quality matters
Bad conditions don’t look dramatic.
They look normal — and that’s why they’re dangerous.
Pre-trade checking isn’t about being cautious.
It’s about being selective.
Read 1 Minute Scalping Strategy for Crypto: Entries, Stops, and Risk Management Explained
The Logic Behind Pre-Trade Check
(What You’re Verifying Before Every Entry)
You can run this mentally — or faster using Pre-Trade Check.
1- Market Environment Check
Before focusing on any single pair, you need context.
Ask:
-
Is the market trending, ranging, or indecisive?
-
Is volatility expanding or compressing?
-
Are moves clean or erratic?
Low volatility kills follow-through.
Chaotic volatility kills execution.
If the environment is wrong, even good setups fail.
Many traders combine this step with a quick glance at market sentiment tools or long vs short positioning to understand the broader context before drilling down into a single pair.
2- Pair Behavior Validation
Not all pairs behave the same — even on the same exchange.
Some pairs:
-
Respect levels
-
Pull back cleanly
-
Move with intent
Others:
-
Fake breakouts
-
Spike randomly
-
Reverse without warning
Pre-Trade Check helps you pause and ask:
“Is this pair worth trading at all?”
If behavior feels unstable, skipping the trade is a win.
3- Structure Clarity (Before Indicators)
Structure always comes first.
Look for:
-
Clear higher highs or lower lows
-
Clean ranges
-
Predictable pullbacks
If structure is messy, indicators won’t save the trade.
No structure = no edge.
This is why many scalpers pair Pre-Trade Check with simple structure-based tools, not complex indicator stacks.
4- Indicator Alignment (Confirmation Only)
Indicators are supporting actors — not decision makers.
They should confirm:
-
Momentum direction
-
Extremes with context
-
Separation, not congestion
If indicators disagree with structure, the trade is weak.
Alignment is rare.
That’s why it matters.
5- Crowd Positioning Awareness
This is where many scalpers get blindsided.
Before entering, you should know:
-
Are most traders long or short?
-
Is one side getting punished repeatedly?
-
Is sentiment clearly one-sided?
Markets move best when traders are trapped.
The goal isn’t to fade the crowd every time —
it’s to know where the crowd is standing.
Many traders check this alongside long vs short ratio data or funding behavior as part of their Pre-Trade Check routine.
Also best to use AI BTC/USDT Signal with it.
6- Execution Reality Check
This step alone justifies Pre-Trade Check.
Before you enter:
-
Is spread tight right now?
-
Is price jumping between ticks?
-
Is execution delayed or unstable?
A perfect setup with bad execution
is still a losing trade.
Professionals obsess over execution.
Most traders ignore it.
If execution conditions are poor, Pre-Trade Check should fail — regardless of how good the setup looks.
7- The Final Decision Filter
Ask yourself honestly:
“If I skip this trade, do I care in 10 minutes?”
If yes — emotion is involved.
If no — you’re thinking clearly.
No trade is also a position.
How Most Traders Get This Wrong
Most traders:
-
Learn one setup
-
Trade it in every condition
Consistent scalpers:
-
Check conditions first
-
Trade only when conditions allow it
Your edge is not your entry pattern.
Your edge is when you choose not to trade.
That decision happens before the entry —
which is exactly where Pre-Trade Check fits.
Tools And Dashboards — Built For Traders Who Move Fast.
How to Use Pre-Trade Check Properly
This part matters.
You don’t open Pre-Trade Check to find trades.
You open it to validate or reject a trade idea.
The correct workflow looks like this:
-
You spot a potential setup
-
You run a Pre-Trade Check
-
You confirm conditions in seconds
-
You trade — or you walk away
That habit alone changes outcomes.
Run a Pre-Trade Check before your next trade
Final Thought
Pre-Trade Check exists for one reason:
To stop you from trading when you shouldn’t.
If you check conditions before every trade:
-
You trade less
-
You trade cleaner
-
You protect your capital
That’s not boring.
That’s professional.
Slow down for one minute.
Trade better for the next ten.
2 thoughts on “How to Check a Crypto Pair Before Trading”